Unique homemade wooden sign (and cheap!)
Unique DIY homemade wooden sign
Forget the high prices commanded for hand-painted wooden signs! You can create your own version for a fraction of the cost, with the phrase that fits your needs.
This DIY makes a unique gift too, allowing the giver to customize the words to the recipient. There are endless options to personalize this in both size and sentiment.
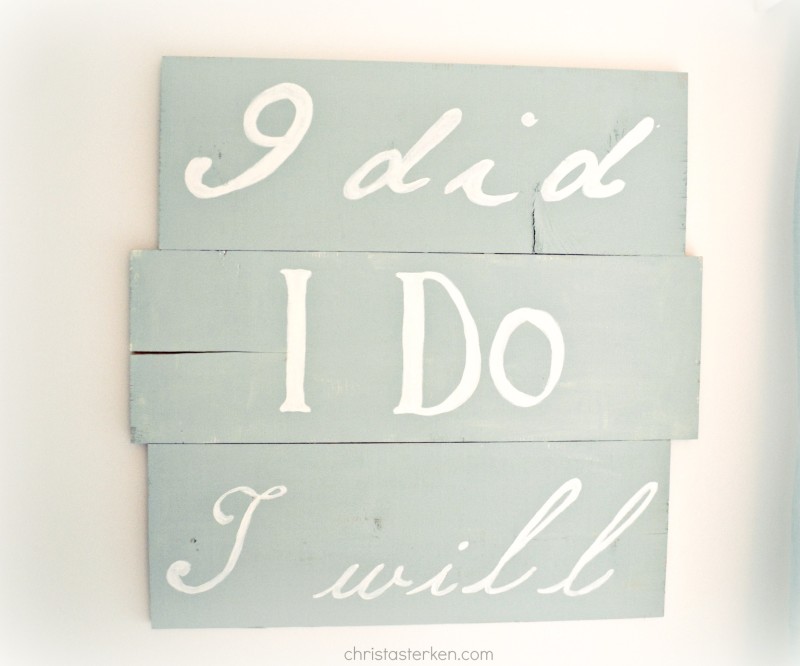
For my project, I wanted to create a gift for my husband to celebrate our marriage. I reminded him that I meant it when I said “I Do“, then, now, and always.
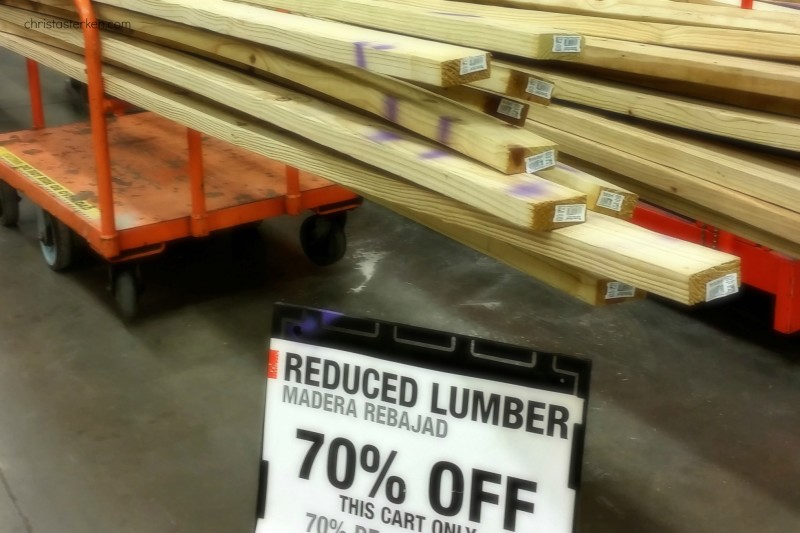
It is a great way to use up scrap lumber or repurpose pallets. Another way to save money on the wood is in the hardware store discount section.
I was able to find nice lengths of wood at Home Depot for 70% off, and they even cut it for free into the sizes I needed.
Check out your local store, and ask if they have a sale section. Have it cut there to make it easier to transport home and faster to put together– without the need for cutting tools.
This is especially handy if, like me, you don’t have a truck!
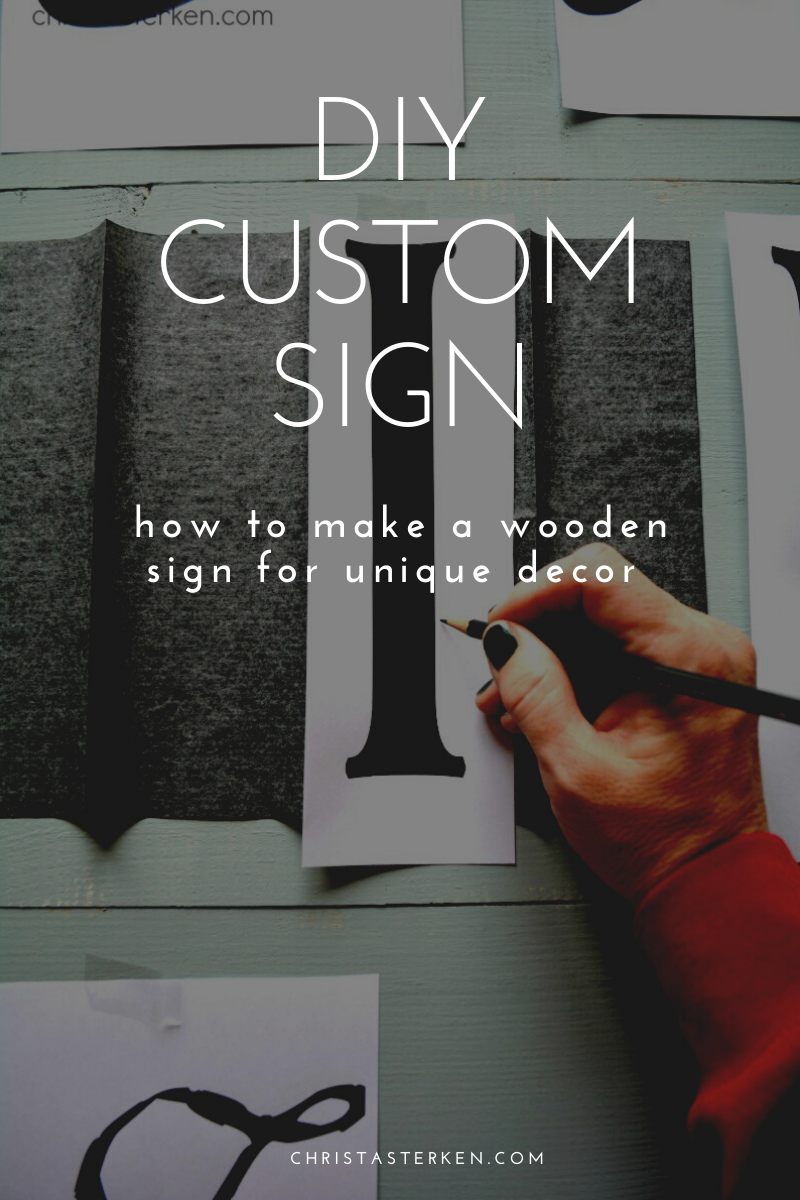
Using letters printed off from a home computer (on regular paper) and a piece of Graphite paper, anyone can replicate any style of sign.
Vintage, modern, rustic…this is a project that any DIY’er can attempt with confidence.
*Disclosure: I only recommend products I do/would use myself. This post may contain affiliate links that at NO additional cost to you, may earn me a small commission to help support this blog. Read full privacy policy here.
How to make a wooden sign
Supplies:
- Wood cut into desired lengths
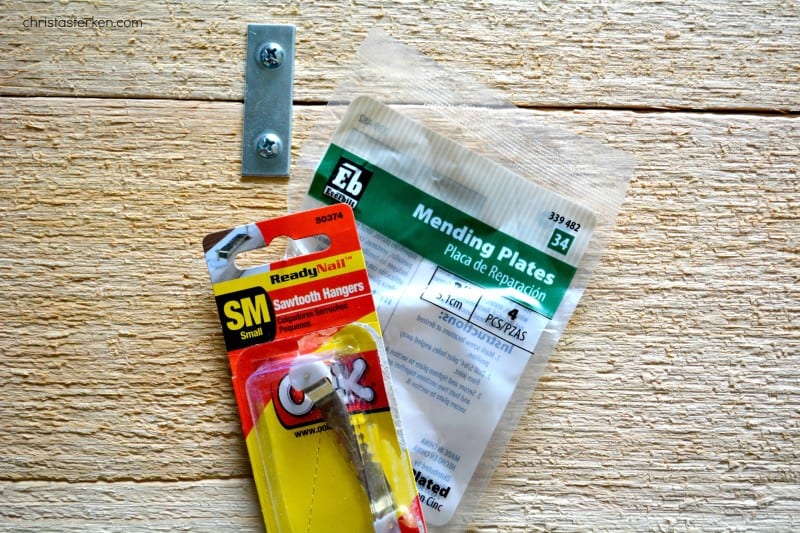
- Metal brackets (I used Mending Plates)
- Drill and screws
- Picture hanging hooks (I used Sawtooth Hangers, just hammer in)
- Paints and brushes
- Graphite transfer paper (found in fine art supply section of craft store)
- Computer and printer
- Pencil
- Tape
- Scissors
- Optional: Paint pen ( I like Faber-Castell Pitt artist pens)
- If you are making a larger sign with more than one piece of wood, lay the planks in a row (wall side up)
- Screw the brackets down, connecting the pieces tightly to each other. Make sure to use enough brackets so it’ll be sturdy when you hang it on the wall
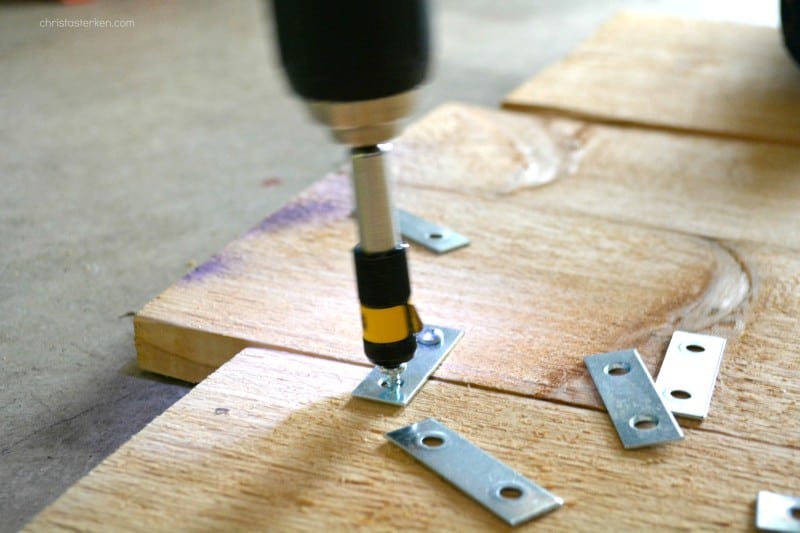
- Install the picture hangers on the back, making sure to choose ones that are of sufficient strength to hold the weight of the wood
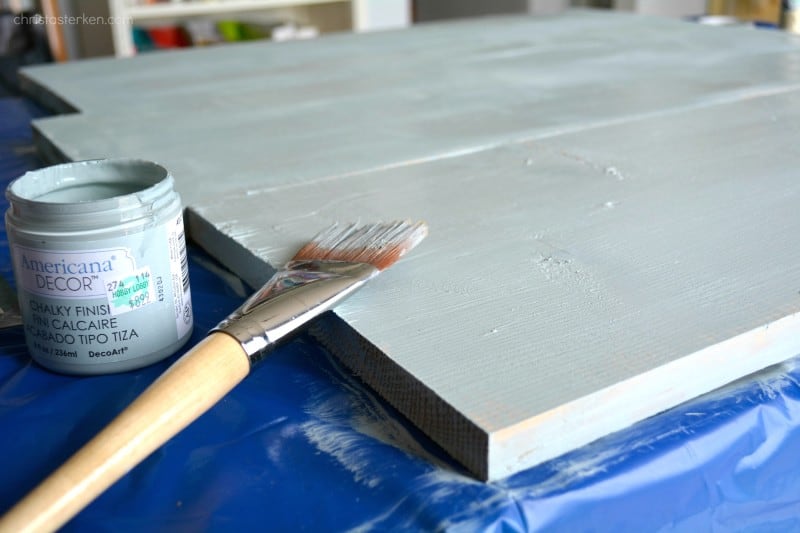
- Paint the front using any type of paint you have. Anything will work, even the inexpensive craft acrylics. Depending on the type of wood you purchased, a primer might be helpful for the base layer. I wanted a vintage look, so I used a chalky finish paint called American Décor
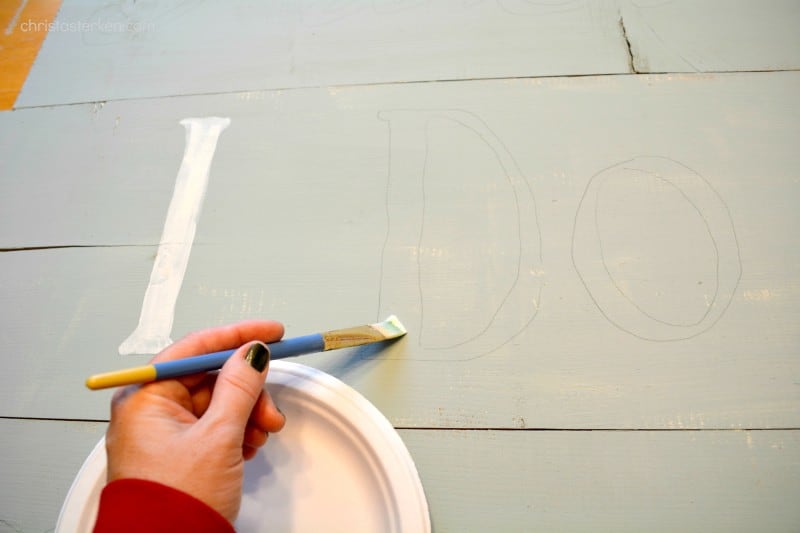
- To create the letters, open a Word document on the computer. Once you decide on the desired word, adjust the size of the letters to fit the size of the wood. Print off one letter per page
- Cut excess blank space off from paper, but leave a wide margin around letters. No need for perfection, it won’t show
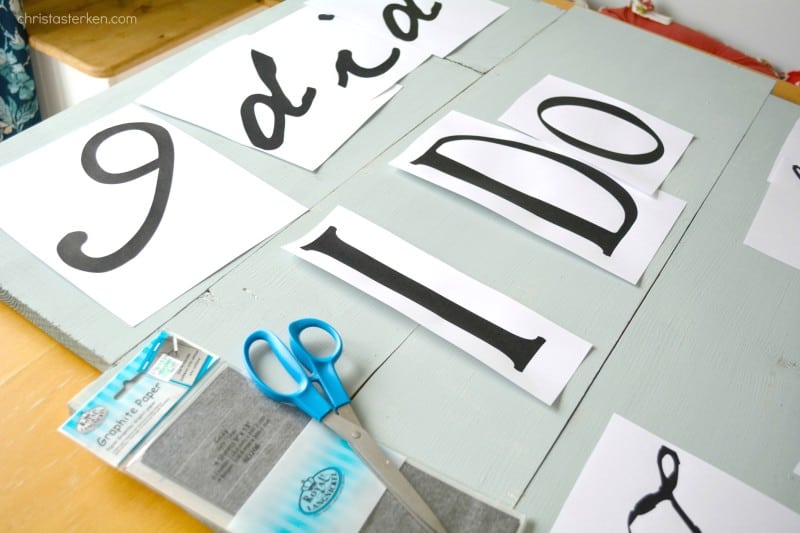
- Arrange the letters on the wood, double-checking sizes to make sure they don’t go off the edge, and use a small piece of tape at the top of the paper to hold them in place
- Place one sheet of graphite paper under the letters, and lay the sheet back down flat
- Use your pencil and trace around the edge of each letter. The graphite paper will leave an outline underneath, which will be painted
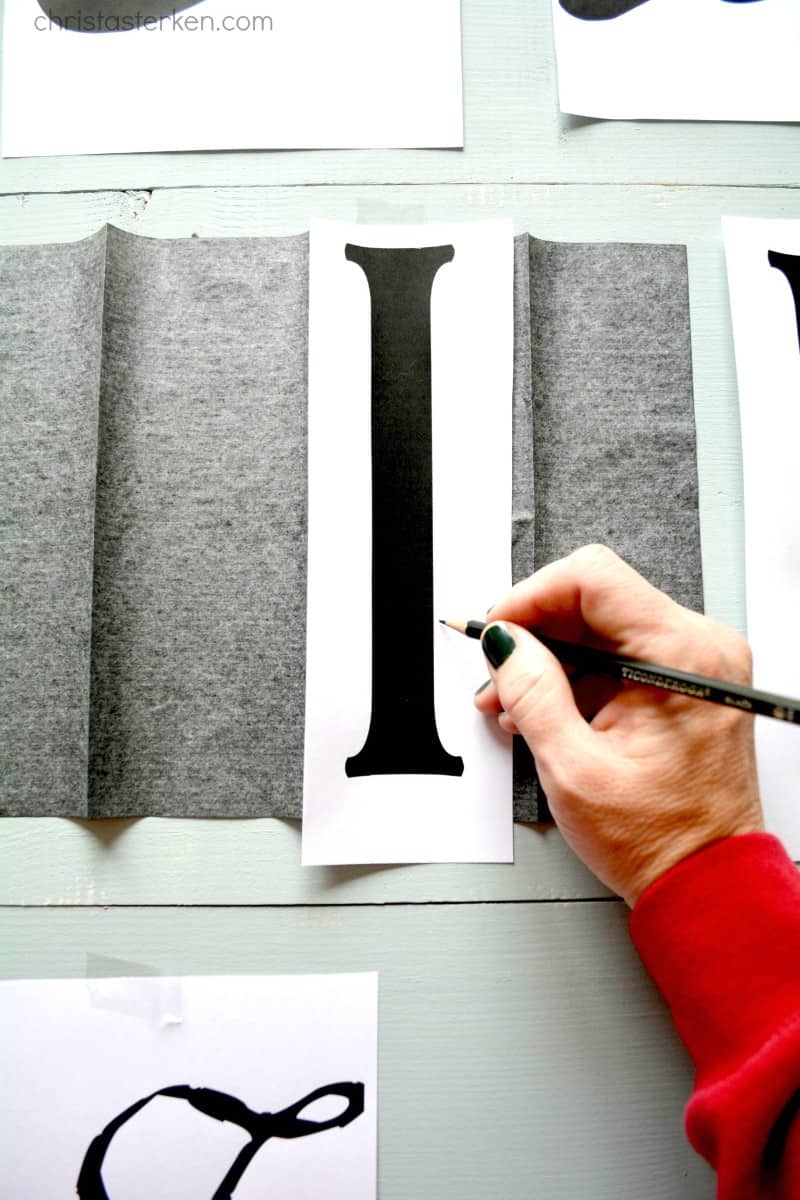
- Once each letter is traced, remove all the papers and your words will be ready for the next step
- Paint in the letters and your sign will be complete!
- Optional: If you prefer are more “finished” look, use the Paint pen to outline the letters before filling them in with paint. If you prefer a vintage look, then the “rough” edges of each letter will add an aged charm

P.S. If you would rather make a sign using vinyl letters, check out this post by The Turquoise Home